DOX42 and SAP Integration

DOX42 and SAP® Integration : Best Practices and Dev Hacks

SAP Connection Config

Dox42 Data source to map SAP data requires the following SAP system connection details
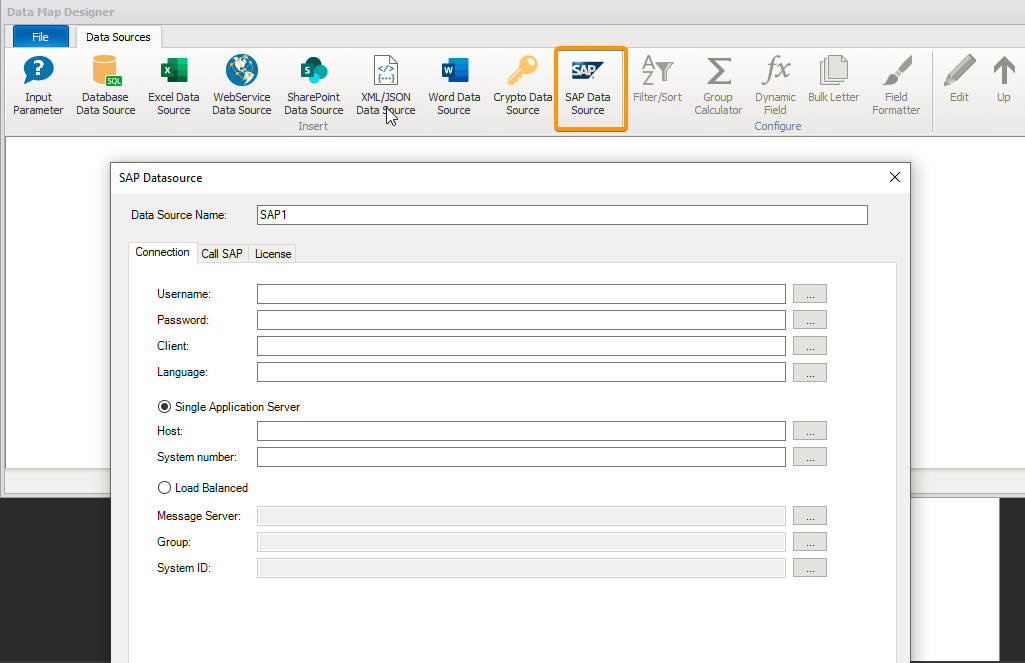
While it is possible to manually enter the values of SAP system parameters, this approach has following shortcomings:

  • Developers need to enter or update application server and login details every time a template is used, moved, tested, updated etc. in the different systems
  • This information needs to be maintained separately in every data map

Best Practice solution:

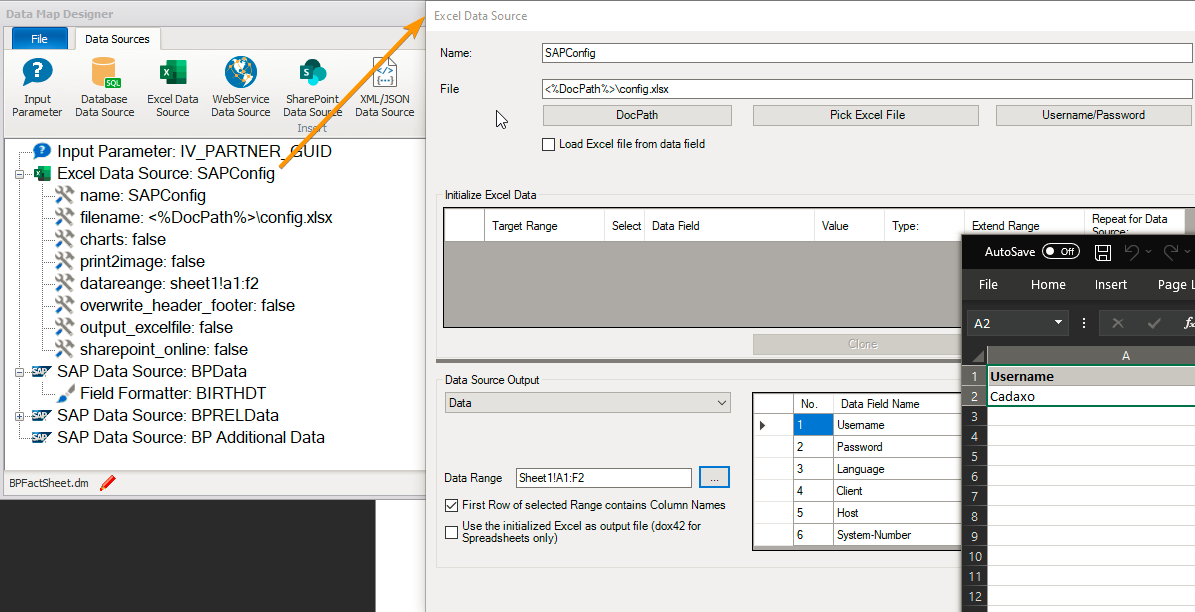
Maintain a separate excel file (e.g., config.xls) containing these details and add it as a separate data map of type ‚excel‘ as shown below:
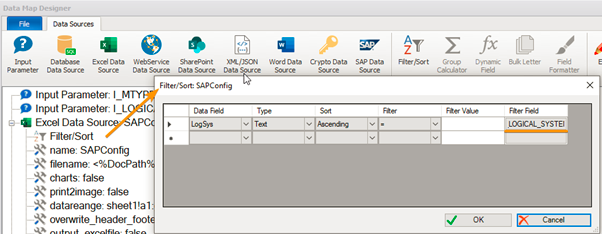
Maintain a filter to dynamically pick correct system connection mapping from the excel file based on I_LOGICAL_SYSTEM as an input parameter:
This file can be used to populate Connection details in all SAP data maps as illustrated below:
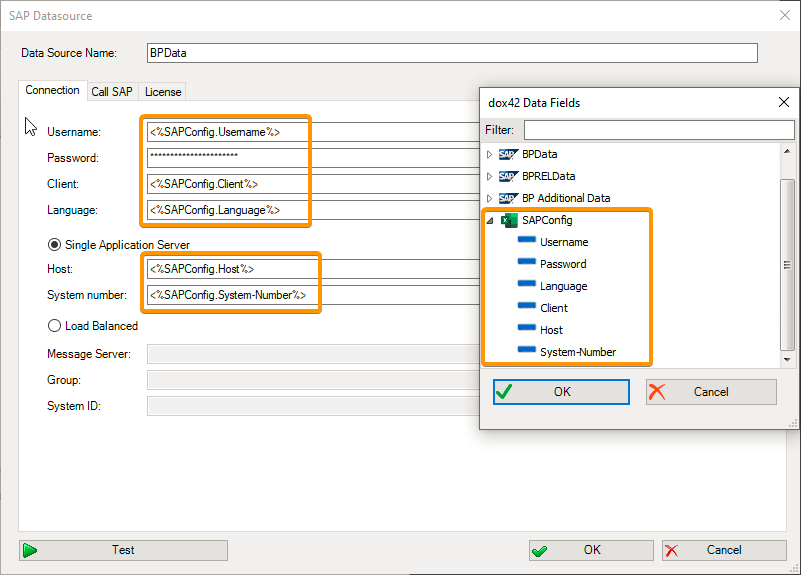
Whenever there is a change in system settings or if we want use powerdoc template in a new SAP system, editing this config file is sufficient (rather than individual maintainance in the connection tab of each SAP data source for every data map)!


Data Mapping Limitations and Tabular Data Mapping

DOX42 data maps can handle only one structure or a table as a return data container (within which it is possible to specify field names, identical to the names used in the SAP source)

To print tabular data,

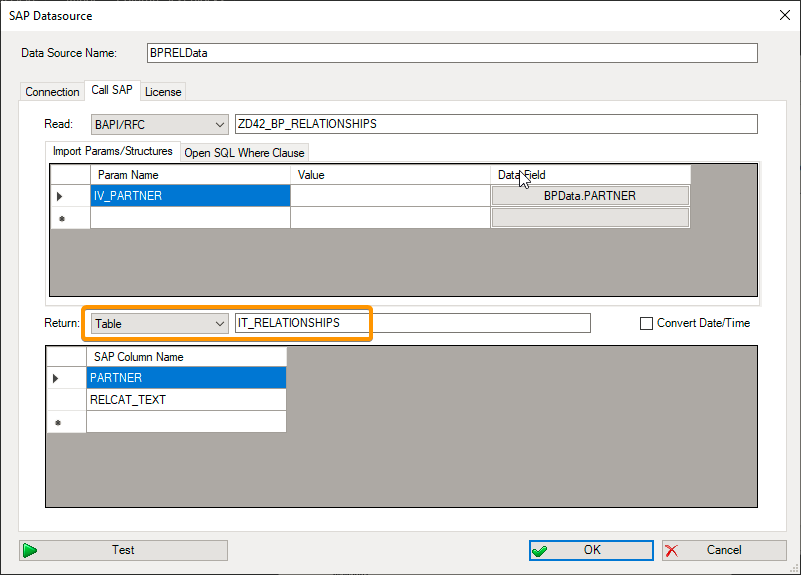
1. Create + map table parameter in the RFC to a data source as illustrated below
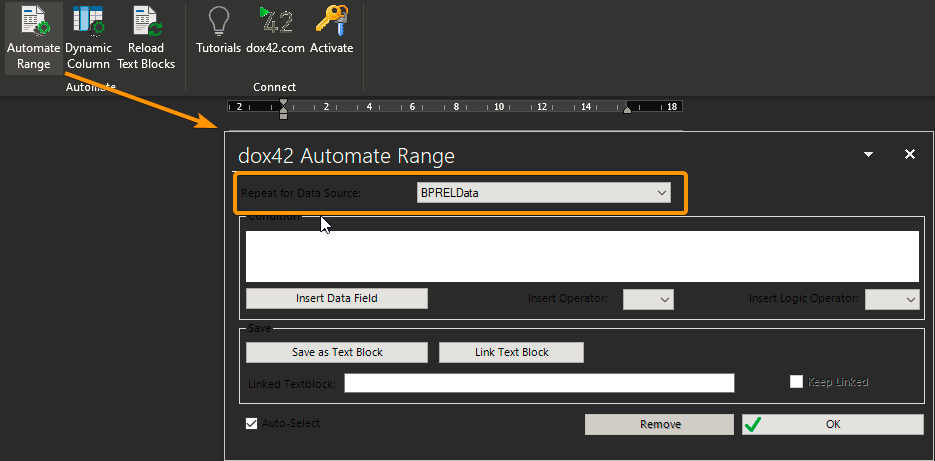
2. use „Repeat for Data Source“ option in the Automate Range wizard


Alignment for Multi-line Output

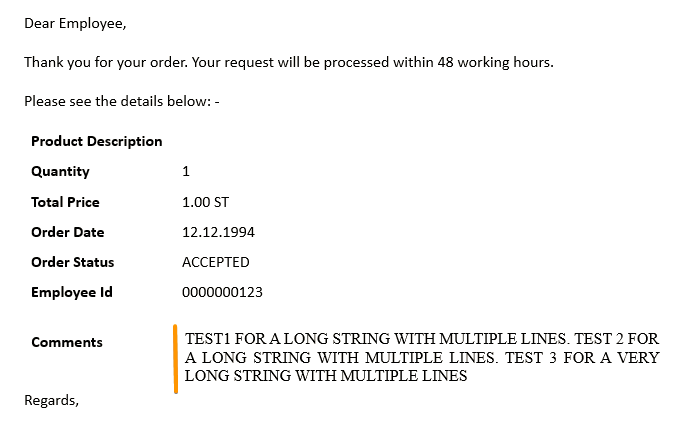
Use the insert frame feature as shown below, if you want to print a text (e.g. notes) that can overflow to the next line and if you need to maintain alignment (i.e. if you want to print line 2 below directly below line 1 while maintaining horizantal alignment)
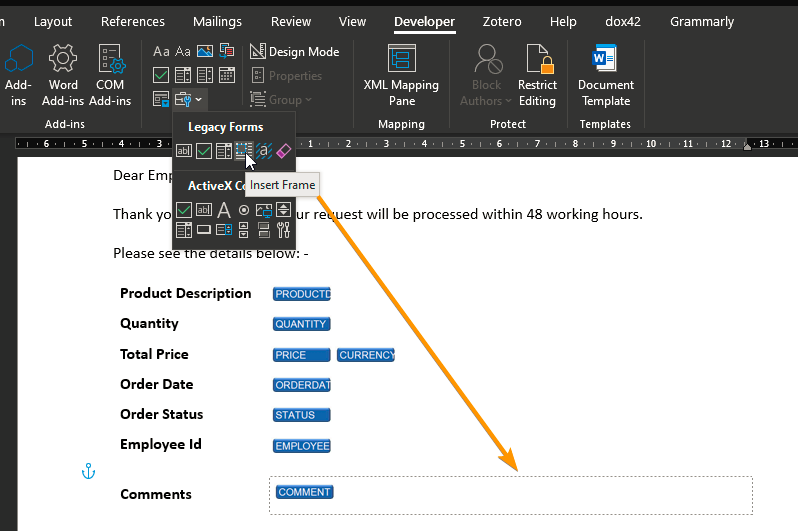
As shown in thescreenshot below, the output data is printed on the multiple lines and text alignment is maintained (i.e. second line starts below the first line)
If you have any further questions about DOX42-SAP integration, feel free to email us :

SQL Cockpit Result Comparison with toggle feature

SQL Cockpit Results Comparison with toggle feature (Cockpit version 3.7 onwards!)

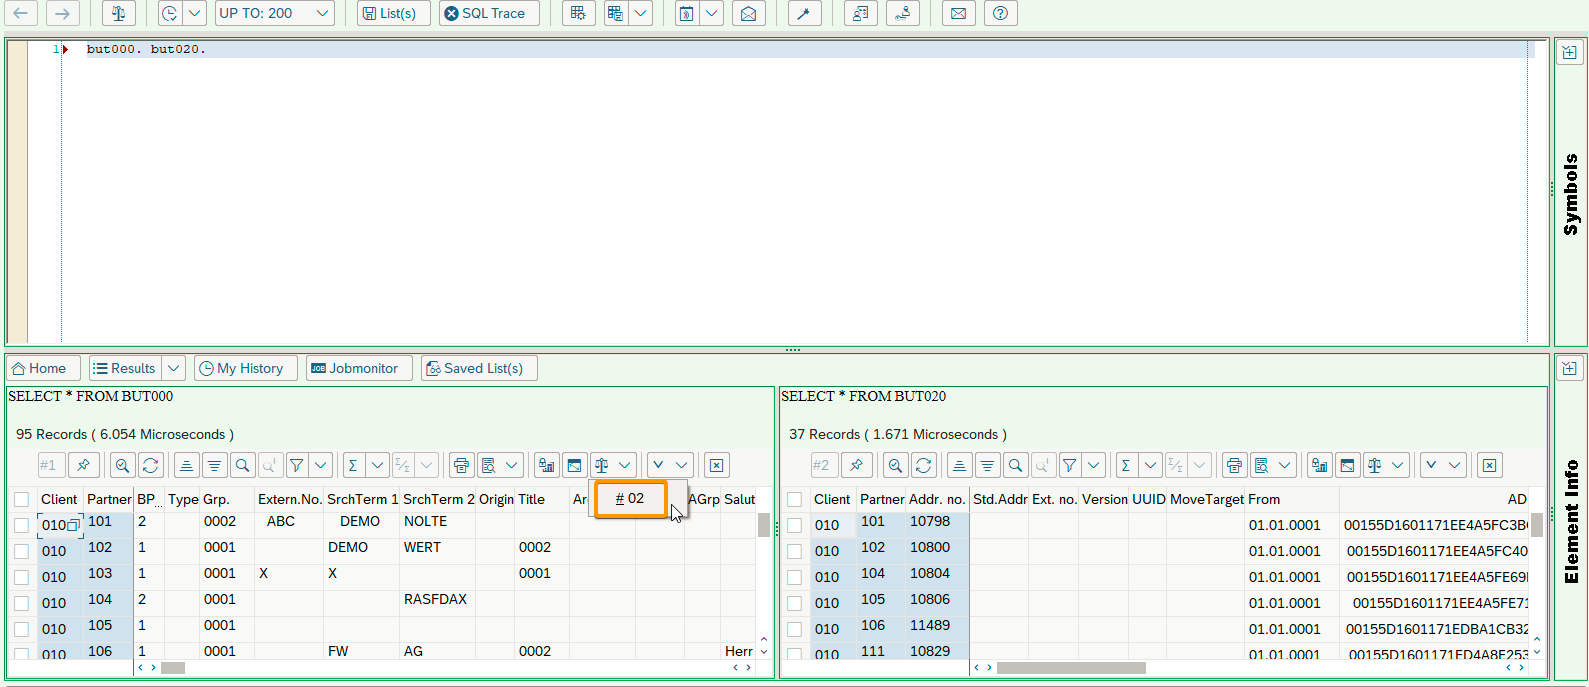
Cadaxo’s SQL Cockpit already had a feature to compare outputs of the queries. This can be accessed as shown below

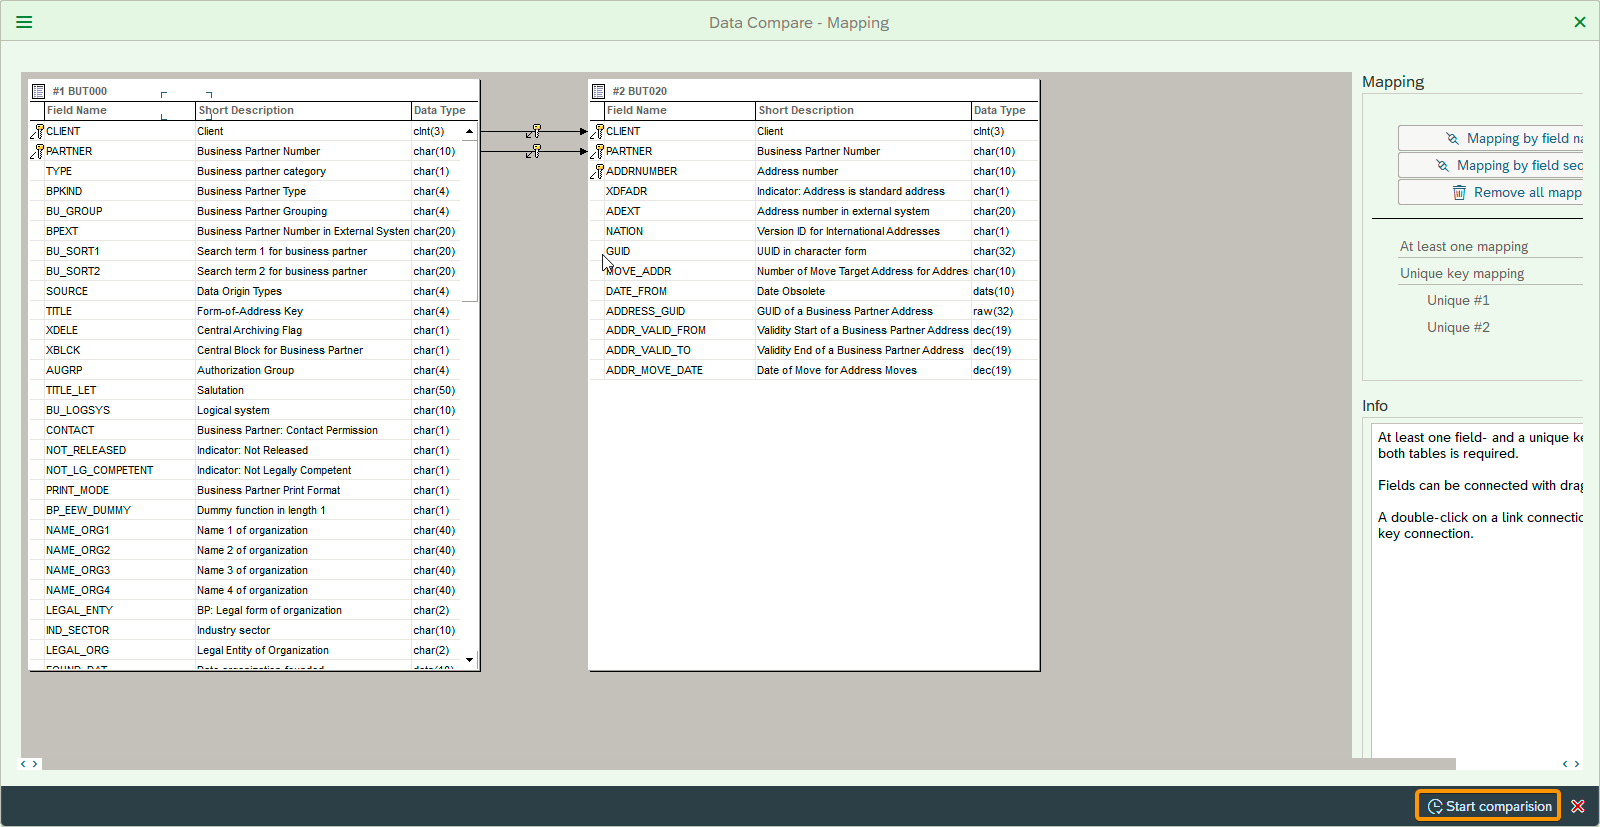
Clicking on the highlighted button #2 above will direct us to the following „Data Compare – Mapping“ wizard

After selecting desired mapping, click on Start comparison button.

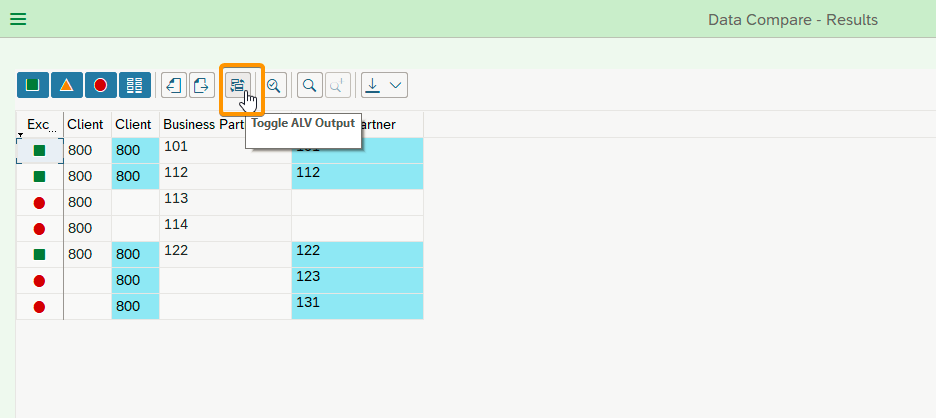
As shown in the following screenshot, we now have a new button (v3.7 onwards) on the menubar, „Toggle ALV Output“


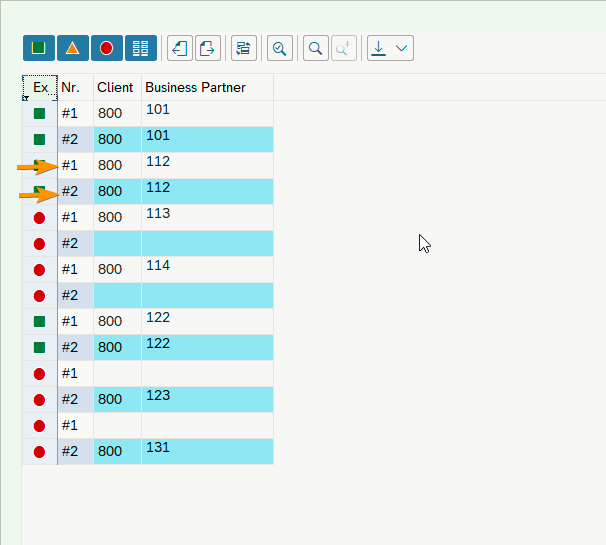
Upon clicking this button, entries from the first and second tables are displayed on the separate lines:

In this „row-based view“, entries are printed on the separate rows.

Blank rows correspond to the missing entries in the outputs results.

Clicking on the toggle button again will restore column-based default view from the previous image

Cadaxo SQL Cockpit Report Generation

Cadaxo SQL Cockpit Report Generation

One important (and cool) feature of SQL Cockpit is an ability to auto-generate ABAP reports directly from the SQL query entered in the cockpit.

We illustrate below, one example of how this may be utilised

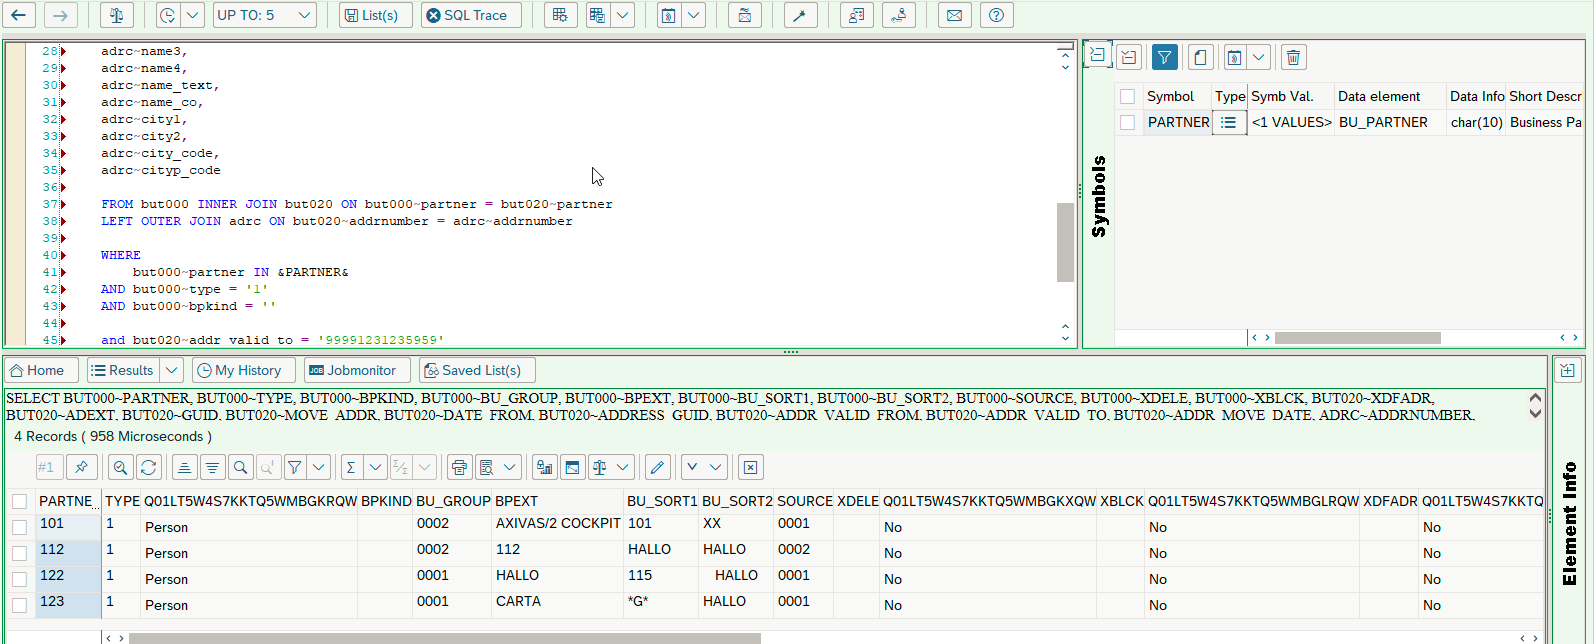
As you can see from the code snippet and screenshot below, suppose we want to generate a report output that executes a relatively complex select query :

If you want to generate SAP report that executes this query, it would be a tedious and repetitive work to create a report manually in ABAP. Report generation feature of SQL Cockpit makes this work much simpler and quicker as illustrated below (We have implemented customer requirements with many more fields and complex select query that pulls data from upto 10 database tables!).

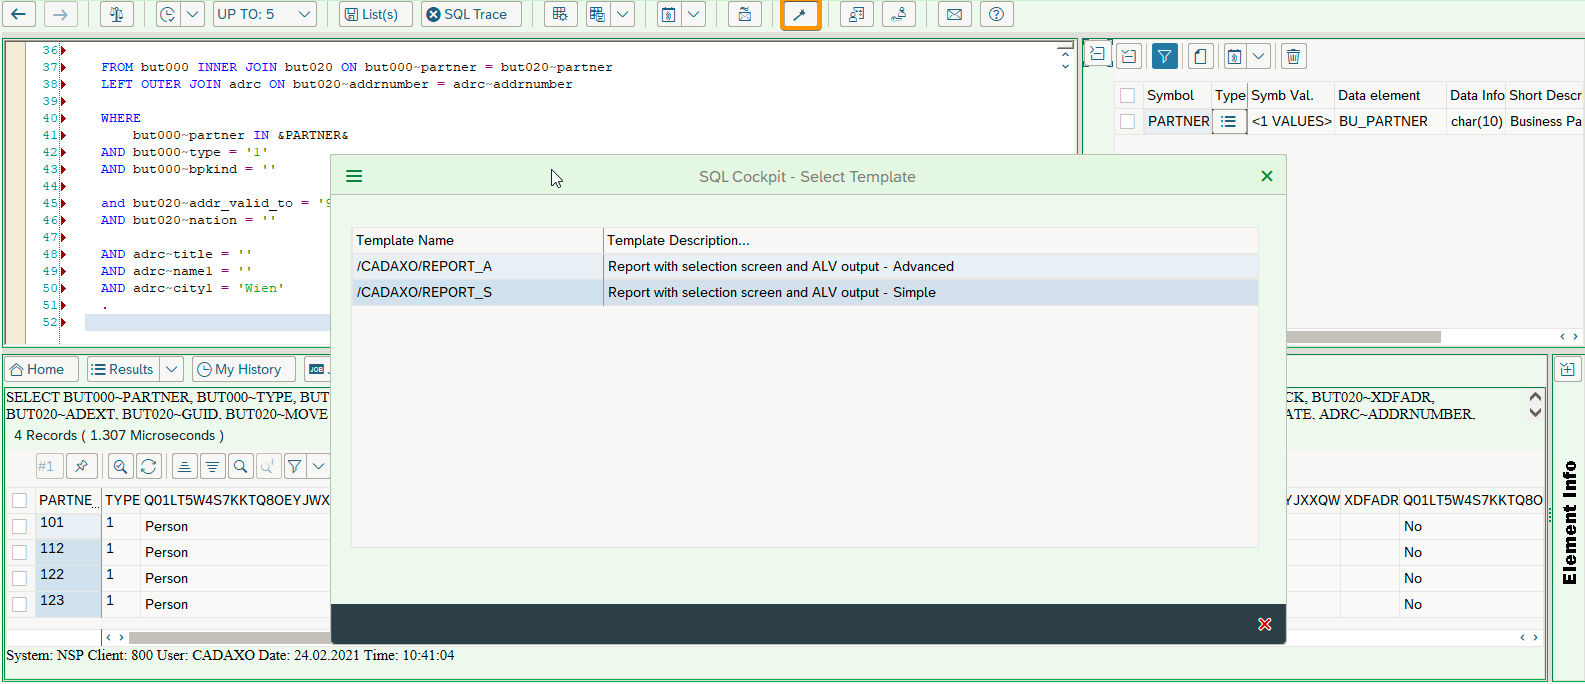
After executing the SQL query, just click on the highlighted „Template“ icon and „Select Template“ textbox appears

Choose an ‚advanced‘ option in the screenshot above.

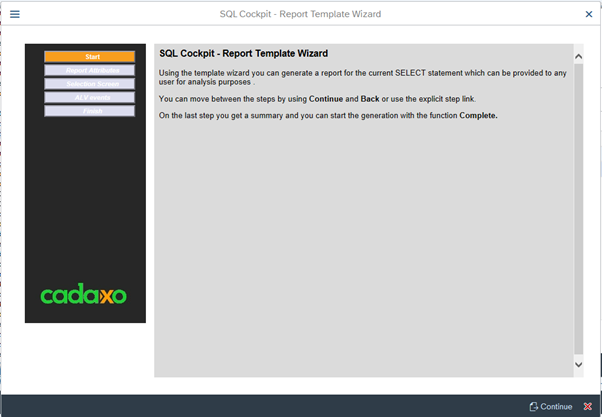
We are taken to the Report Template Wizard

Click on the Continue button

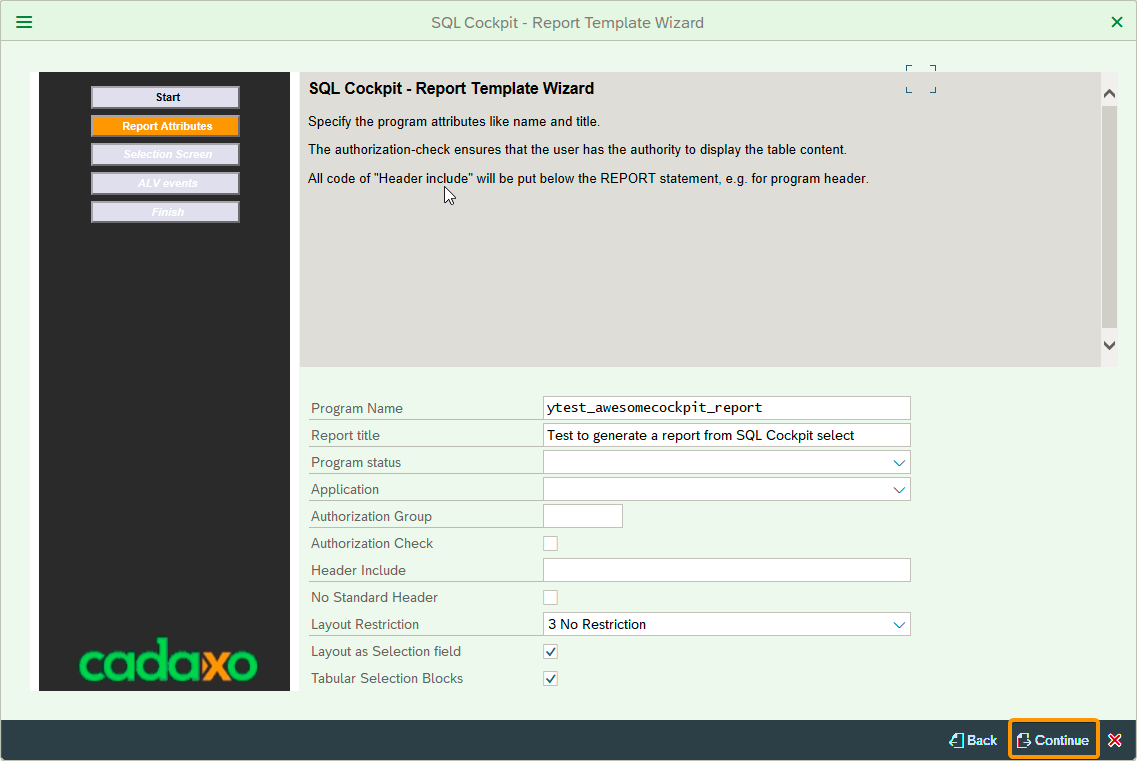
Enter the report name, description, and other optional information. Note that „Tabular Selection Blocks“ checkbox to generate multiple tabs on the selection screen is selected. Continue to the next window

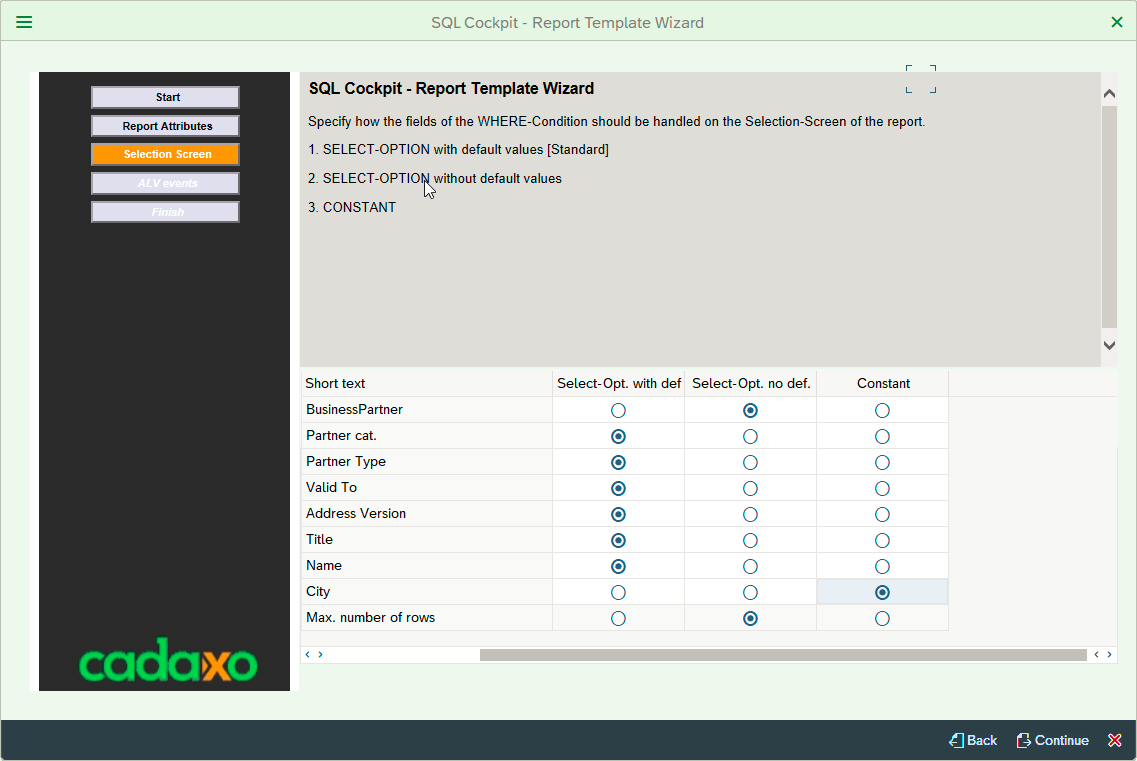
As shown below, we get a list of selection screen field options, (also auto-generated from the WHERE condition of the SQL query 🙂 )

As shown above, we have three options…

  1. create a selection screen field with an auto-populated value from the SQL where condition
  2. create a selection screen field without an auto-populated value from the SQL where condition
  3. Select query of a generated report will contain hard-coded value from the SQL where condition

Click on Continue button again after making your selections from one of these options

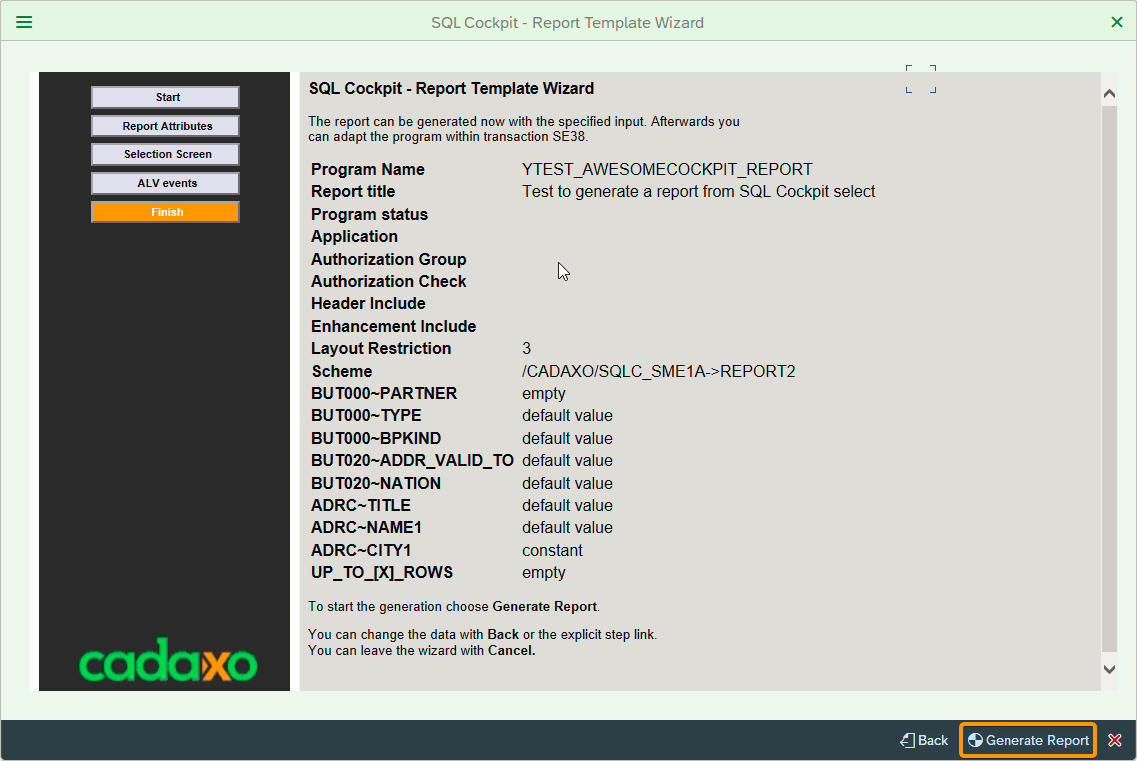
Finally, a generate report option is presented along with a list of specified report parameters in the previous step as seen below

Click on the Generate Report button

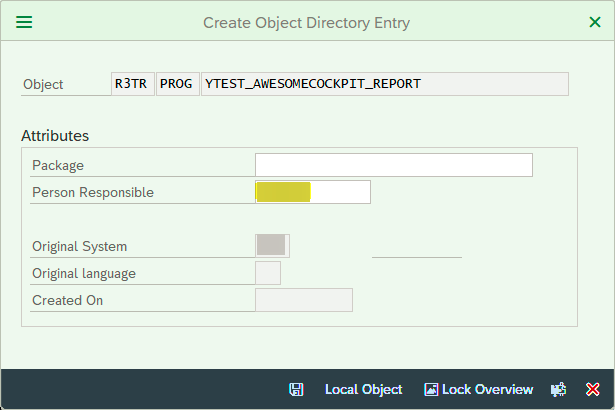
Select package as applicable and we are done.

Presto!

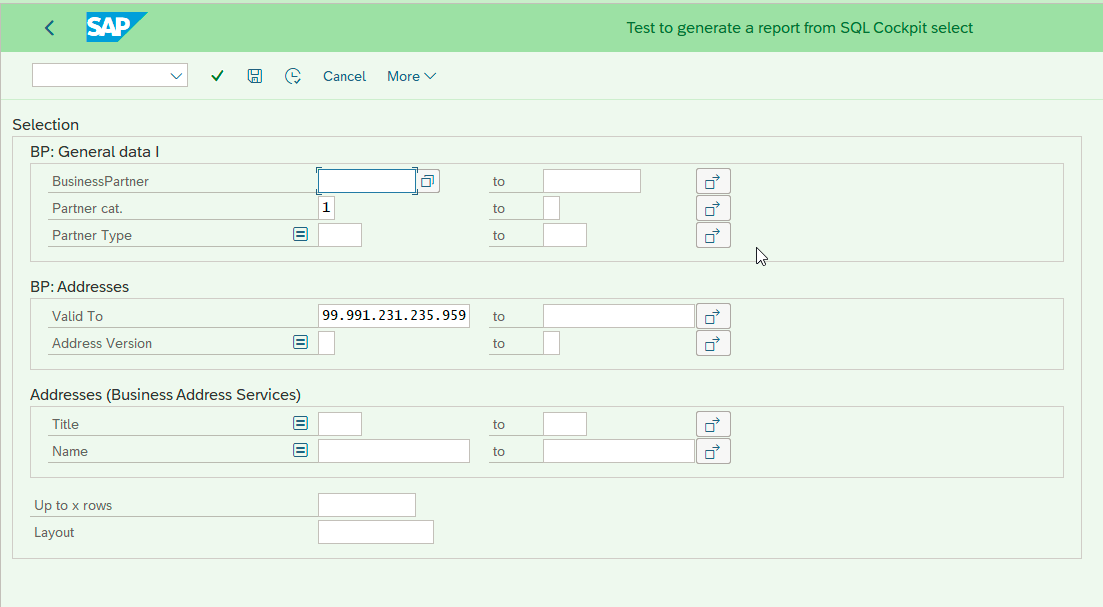
A generated report can be viewed / executed in SE38 like any other custom report.

Note the selection screen as seen below (with different selection screen tabs for fields from different tables)

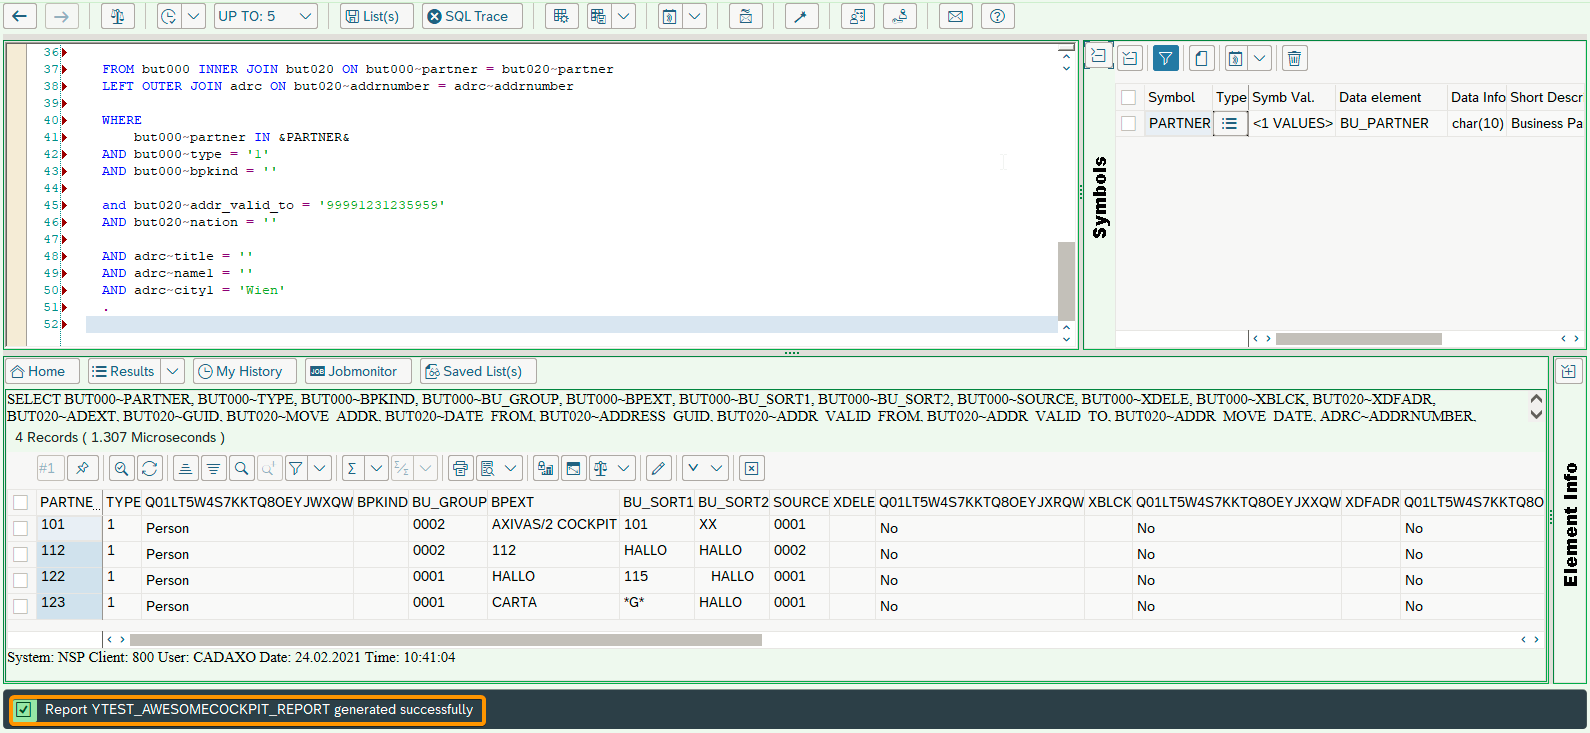
Here is a screenshot from the select query (that was also auto-generated, of course 🙂 )

As highlighted in the screenshot, one of the where condition was created with a hard-coded values from the select query („Wien“) as per the selection in the report generation template!

Conclusion: we can auto-generate complex SAP reports using SQL Cockpit in less than 15 minutes! We can even customize special features based on individual client requirements.

This saves a lot of a lot of repetitive work for programmers and power users 😉